Friday, May 1, 2009

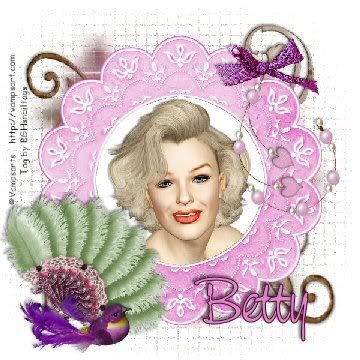
Marilyn


Photobucket


Tube Of Choice... Face Size is Best for this TUT..
I used Vampsart found
here.
Tube is on page 9 of free tubes
The Beautiful scrap is a FTU from Babycakes Scraps
Found
here. Look for Lables and click on Free.
Mask is WSL#84 found here.
Click on the word Navigate.. Then in the list click Downloads.
Use Text Of Choice

Open a New 600 X 600 filled with white.Open the bcs Scratchy paper and Minimize.
Go to Materials Palette and open Pattern, select you paper.
On the White background go to layers and do a New Raster Layer at these settings
Blend Mode Normal, opcity 100, layer visible. Use flood fill tool and fill with your paper.

Apply the Mask, merge the group, now Duplicate the Mask Layer, on the layer,
Select All - Modify ( Expand X6 ) - Effects ( Mosaic Antique ) at these settings,
columns 33 - rows 33 - tile diffusion 60 - widith 3 - grout diffusion 100 and
have the symmetric box checked, Apply. Now on Layers, slide the setting from 100 to 60.

Cross out your white Background ( tic on the Eye to red X ),
now merge the two mask layers visible. untic the eye on white background.

Open the Round bcs frame.. Copy, paste as new image, close the org.
on the Copy, go to Hue Saturation, in Hue/Saturation/Lightness use these settings ,
Tick Colorize, set Hue at 315, Saturation 68, Lightness 2, Ok

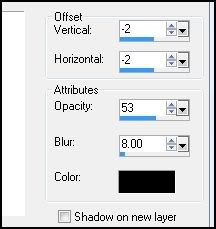
Use the Magic Wand in the Center of the Frame, you will see the marching ants, go to Selections, modify - Expand, set at X2.-OK flood fill with white..Float, defloat, copy your tube and Paste, use the mover tool to set tube where you like it best.now invert..use your Delete key and the edges of the tube hanging outside of the frame will disapper. Select None..Drop Shadow the tube at these settings,Offset Vetical -2, Horizontal -2, Opacity 41, Blur 5.00, Color Black.

Merge Layers Visible. Copy and Paste to your Background Layers.. Add the Elements you like from the bcsscraps you like. Drop shadow each at the same sttings as used on the tube.

Add the Tube Copyrights and Your own Credits. Merge all Visible..

Save as JPEG-JFIF Compliant


This TUT is a BGHsnailtags Copyright

Teddy Hugs


Photobucket


The tube I have used is a pay to use licensed Keith Garvey, found here.
Scrap is by Baby Cakes you can purchase it here.
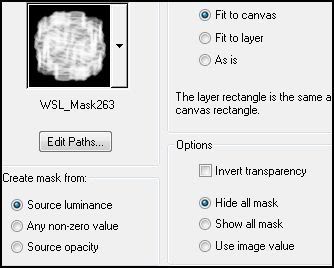
I used Weecotslass Mask #263 found here.
Text used is DJ Garden

{note about the Scrap}
Lynne has beed adding things to the blog, when you click on the
link, when page opens scroll to the bottom and tick on Older Post.

This TUT is for Advanced users of PSP. I have not used plug-ins on this TUT.
Open a 600 X 600 flooded with white. And a Transparent 600 X 600.
Minimize the White Background.

{ Note: Remember to Save Offen }

Open your Tube a minimize also, find the
bcs green angel paper open, copy,
and paste into the Transparent raster. In layers, load disk from mask, and find the mask
use the settings shown.

Photobucket

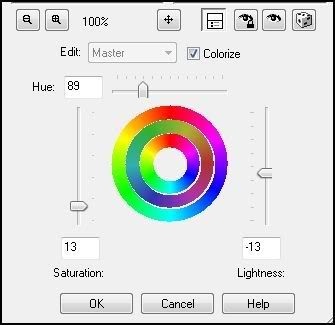
Click OK.. go to Adjust, Hue/Lightness Colorize..use the settings below, then tick OK

Photobucket

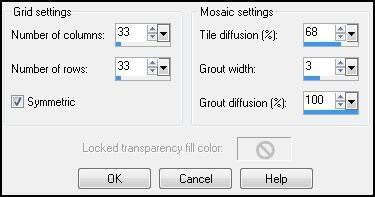
Go to Effect-Texture-Mosaic Antique Use these Settings

Photobucket

re-size to 80% , Copy.. Open the White Background and paste the
your Mask raster. Merge Visible

Open the
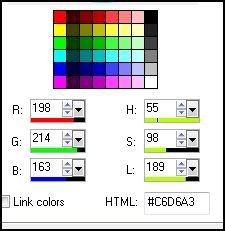
bcs patchwork Frame..Copy and Paste as a new image. close out the org. frame. Re-size your copied frame to 25%, Use the Magic Wand and tick inside the empty spot of the frame {also the small hole in the lower left corner} go the Selection-modify, expand x2.. You will flood-fill the color of your choice. I used the color show below.
Photobucket

Now in Selection, select none. Pull up your Tube and Copy and Paste as New Image now in Image Mirror you tube,{ if you to is very large you may have to re size} Use your Magic Wand and tick inside the frame where you just added color. Copy the mirrored tube and paste as a New layer, tic on the mover tool to move the tube in place. When you are satisfied with where you have it placed. Go to Selection-invert-float-defloat-and use the Delete key on your keyboard. Now do a Drop Shadow at these settings, then Merge Visible

Photobucket

Copy and Paste onto the Background.

Now to add the same tube again.. {Do not mirror this one} Copy and paste the tube.
Open the Scraps and chose the Elements you like. When you are satisfied with it,
go down the layers and add the same settings on drop shadow for all layers,
except the Background. When You have all the Drop shadows in Merge Visible.
Save as .jpg

This TUT is Written by ©BGHsnailtags.
No part of this TUT is to be Copied, and Pasted any where.