

Download Here
Tuesday, July 21, 2009
Monday, July 20, 2009
Evening Dreams
The Tube is Mine and can only be obtained in my Aimoo Group Here
Open a Transparent 600 X 600 .
Open paper four, copy and paste to the Transparent Layer,
Open the Mask, Minimize, New Raster Layer, from Image,
in source window pick the mask, have the Invert Mask data Checked,
Ok. Merge Group.
Open the Oval frame, copy and paste as new image, close the Org.,
Resize the new image frame at 50%, Tick in center of frame
with your magic wand,
note, it did not go all the way to the edge in some areas.
Tick again in that area so the marching ants
are all close to the frame edge. Go to selections,
invert, open paper five, copy and paste over frame, use your keyboard delete.
Select none.And merge visible.
Copy the tube of your choice and set to the Frame.
Resize as needed, you can erase any areas you don't want to show,
just be sure the tube is still highlighted in your layers.
When you have it the way you like. Merge Visibe,
copy and paste to the Mask Background.
Add the elements you like.
I save in png. so there is no white background showing.
This TUT is a ©BGHsnailtags
Do not copy in anyway.
It may be printed for your use.
Friday, July 17, 2009
Tuesday, July 14, 2009
Sunday, July 12, 2009
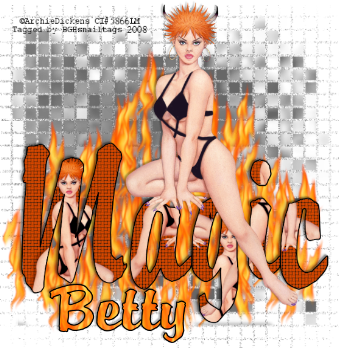
It's Magic
Gap=1, Width=5, Opacity=66Weave color is darkest grey, Gap color is Black.
copy and paste as a new image,you may re-size the tube if it is to large.
After you know you can fit it into at least three different places on the word.
Copy and paste into the first area, just do paste again and place,
repeat as manytime as you like. . Go to your raster layers and click on
the word to highlight..now invert. Moving up the tube layer one at a time,
highlight and hit your delete key.O ne at a time..after all the extra tube area is gone.
Select None.Minimize the word for now.
Select all - modify -Expand x 4.Go to Effects- Texture-Mosaic Antique .
Copy the flame tube and paste to the mask,now paste the Word,
then add the Main tube.Drop shadow as you like.
then minimize,go to Material Pallet and set the flame tile to show in the
bottom color box.Do the top color in black.. Do your Text.Merge all visable.
Remember your copyrights and your own credits.
Wednesday, July 8, 2009
Classy Lady
My tube is the Addorable work of PinUp Toons found Here
The Scrap is mine called Soft Creams found Here
the Mask is included in the scrap kit.
The Template set is mine called Build Your Own found Here
Open New 600 X600 filled with white..Copy and Paste the Paper 1 over the white, open the Mask, minimize, Layers,New Mask Layer,From Image,In Drop box click on the mask, have the invert mask data checked, OK..Now Merge Group. Close out the Minimized Mask from screen.
And Now Minimize your new Masked layers.
Open a New Transpanent 600 X 600.. Open the larger Black Round in Templates and Paste to new layer, use magic wand in center of template, Selection, Modify, Expand X1..Seletion, Invert. Copy Paper 5 and paste to Template, use your delet key on keyboard.Select None..Now Copy..
Unminimize Mask layer and paste the Template..
with this layer highlighted in layer palette, go to Effects, Textures,
Mosaic Antique..use these settings..Grid set at 3,number of columns=25,number of rows=25, tile diffusion=62 grout width=4 grout diffusion=61, and the symmetric checked.OK Now in layer palette.. on the eye and % bar slide to 40 % opacity then right click on the template layer , arrage, Move Down. This will move it below the mask layer.
Copy and paste Frame 3, use the Deform Tool to size as you like.
Add your Tube, © and elements as you wish.
This TUT is a ©BGHsnailtags