Tuesday, November 24, 2009
Monday, November 16, 2009
Monday, November 9, 2009
Tuesday, November 3, 2009
Monday, October 26, 2009
Monday, October 19, 2009
Monday, October 12, 2009
Monday, September 21, 2009
Wednesday, September 9, 2009
Monday, September 7, 2009
Tuesday, August 25, 2009
Tuesday, August 18, 2009
Monday, August 10, 2009
Tuesday, August 4, 2009
Tuesday, July 21, 2009
Monday, July 20, 2009
Evening Dreams

The Tube is Mine and can only be obtained in my Aimoo Group Here
Open a Transparent 600 X 600 .
Open paper four, copy and paste to the Transparent Layer,
Open the Mask, Minimize, New Raster Layer, from Image,
in source window pick the mask, have the Invert Mask data Checked,
Ok. Merge Group.
Open the Oval frame, copy and paste as new image, close the Org.,
Resize the new image frame at 50%, Tick in center of frame
with your magic wand,
note, it did not go all the way to the edge in some areas.
Tick again in that area so the marching ants
are all close to the frame edge. Go to selections,
invert, open paper five, copy and paste over frame, use your keyboard delete.
Select none.And merge visible.
Copy the tube of your choice and set to the Frame.
Resize as needed, you can erase any areas you don't want to show,
just be sure the tube is still highlighted in your layers.
When you have it the way you like. Merge Visibe,
copy and paste to the Mask Background.
Add the elements you like.
I save in png. so there is no white background showing.
This TUT is a ©BGHsnailtags
Do not copy in anyway.
It may be printed for your use.
Friday, July 17, 2009
Tuesday, July 14, 2009
Sunday, July 12, 2009
It's Magic
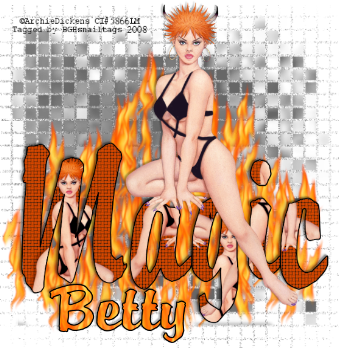
Gap=1, Width=5, Opacity=66Weave color is darkest grey, Gap color is Black.
copy and paste as a new image,you may re-size the tube if it is to large.
After you know you can fit it into at least three different places on the word.
Copy and paste into the first area, just do paste again and place,
repeat as manytime as you like. . Go to your raster layers and click on
the word to highlight..now invert. Moving up the tube layer one at a time,
highlight and hit your delete key.O ne at a time..after all the extra tube area is gone.
Select None.Minimize the word for now.
Select all - modify -Expand x 4.Go to Effects- Texture-Mosaic Antique .
Copy the flame tube and paste to the mask,now paste the Word,
then add the Main tube.Drop shadow as you like.
then minimize,go to Material Pallet and set the flame tile to show in the
bottom color box.Do the top color in black.. Do your Text.Merge all visable.
Remember your copyrights and your own credits.
Wednesday, July 8, 2009
Classy Lady

My tube is the Addorable work of PinUp Toons found Here
The Scrap is mine called Soft Creams found Here
the Mask is included in the scrap kit.
The Template set is mine called Build Your Own found Here
Open New 600 X600 filled with white..Copy and Paste the Paper 1 over the white, open the Mask, minimize, Layers,New Mask Layer,From Image,In Drop box click on the mask, have the invert mask data checked, OK..Now Merge Group. Close out the Minimized Mask from screen.
And Now Minimize your new Masked layers.
Open a New Transpanent 600 X 600.. Open the larger Black Round in Templates and Paste to new layer, use magic wand in center of template, Selection, Modify, Expand X1..Seletion, Invert. Copy Paper 5 and paste to Template, use your delet key on keyboard.Select None..Now Copy..
Unminimize Mask layer and paste the Template..
with this layer highlighted in layer palette, go to Effects, Textures,
Mosaic Antique..use these settings..Grid set at 3,number of columns=25,number of rows=25, tile diffusion=62 grout width=4 grout diffusion=61, and the symmetric checked.OK Now in layer palette.. on the eye and % bar slide to 40 % opacity then right click on the template layer , arrage, Move Down. This will move it below the mask layer.
Copy and paste Frame 3, use the Deform Tool to size as you like.
Add your Tube, © and elements as you wish.
This TUT is a ©BGHsnailtags
Friday, June 26, 2009
My First Template Set
And as always, everything I make is free to use .
Everyday life and My Group keeps me busy..
I'm working on my third Scrap..
hope I have it here sometime this coming week.

Download HERE
Tuesday, June 23, 2009
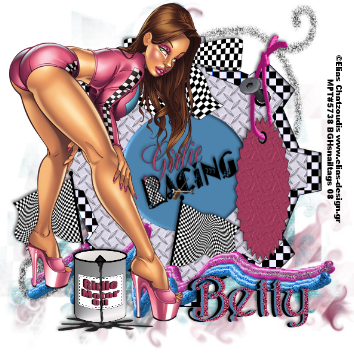
Girlie Racing
Friday, June 12, 2009
Whispers
The Tubes I used are the beautiful art of Barbara Jensen PTU Licensed HERE
The wonderful Scrap is a PTU from Babycakes called Wind Song Here
The Mask used is called Love Notes that is mine andcomes in a pack of four mask found Here
Open a New 600 X 600 flooded with white.Open Paper Thirteen, copy and paste to background,close the org..Open the mask and minimize, go to Layer, New Mask Layer, from Image,drop the selection box tick you mask, have the invert mask date unchecked, OK
Open the BCS Heart frame, using magic wand click all theshadowed areas inside both sides of frame first. You will be clicking several times. When the marching ants are as close to the outer wall of the frame as you can get, then click in the center.Go to selection, modify, expand X1. Tick the Flood paint can,then Pick a nice color that looks good with the Tubes and the scrap.
Filling both frames.
Testing the size of tubes Copy one of tubes and paste to frame, move around and re-size with Deform Tool,when you have it the size you need, copy and paste asnew image, and delete the tube from frame..Do the same with the other Tube..Now we are back to the empty frame, on one heart use the magic wand,go to selection, float, defloat, invert, now grab the mover toll.Copy the tube you want on the side you are doing..paste and use the mover to set tube in place. On Key Board pad hit Delete.Drop Shadow the tube. Repeat the same steps for the other side of frame.
When you have all this,then copy and paste to the background.Re-size to fit. Add the Elements you like. Drop shadow all, add theCopyrights for the tubes.
If saving as png. delete the whitebackground you started with..
Then Merge Visible.If saving as Jig. just merge visible.
TUT by ©BGHsnailtags
Do Not copy and Paste any part of this TUT
Give Credit Where Credit is Due..
Wednesday, June 10, 2009
Having Coffee With Friend's
Tubes I used are PinUp Toons PTU Licensed found Here
Mask is WSC #12 found Here
The Scrap is mine called Cafe Brown's found Here
Open a New 600 X 600 flooded with white.Open paper 1, copy and paste to background.Open Mask,minimize, go to layers, new mask layer, from image,tick the little button for dropdown, locate the mask and tick,untick the invert mask data.OK merge group.Duplicate, on new layer go to texture-stucco 02-Color type in #705940-settings=size %88-smoothness 24-depth 56-ambience 37-shininess 31-angle 255-intensity 55-elevation 20- tick OK.Back to Texture, tick Mosaic Antique ,settings=columns 25-rows 25-tile diffussion %2-grout width 4-grout diffusion 61-OKOn layer Palette, move textured mask down.
Open the Frame , use magic wand in center,go to selection,modify, epand x2, flood with white, in selectios,select none.Test your tube for size fitting, copy the tube and paste as new layer,using deform tool resize each to fit just the upper shoulder and head.When you have it like you want it, copy the tube and paste as new image.Now delete the tube layer from frame.Again click in center of frame with magic wand, go to selections,float, defoat, invert. Now tick on the mover tool,and copy the resized tube,paste to tag, use the mover to move into place.. now on your key board, click Delete.. Go to selection and select none.
Drop shadow the tube.Place your elements.. Drop shadow all except youe mask layer..
* Now before you merge visible,do you want the white background or do you want it clear so it looks nice on any page color..If you want it clear like mine, go down to the white layerand tick the eye, make sure the background layer is highlighted in blue. Delete..Add you Coperights and merge visible..For the Clear tag you must save as png..
This TUT is a ©BGHsnailtags
Do Not copy any part of this TUT
You may print it out to help you with your tag.
Give Credit where credit is due.
Friday, May 1, 2009
Marilyn
Tube Of Choice... Face Size is Best for this TUT..
I used Vampsart found here.
Tube is on page 9 of free tubes
The Beautiful scrap is a FTU from Babycakes Scraps
Found here. Look for Lables and click on Free.
Mask is WSL#84 found here.
Click on the word Navigate.. Then in the list click Downloads.
Open a New 600 X 600 filled with white.Open the bcs Scratchy paper and Minimize.
Go to Materials Palette and open Pattern, select you paper.
On the White background go to layers and do a New Raster Layer at these settings
Blend Mode Normal, opcity 100, layer visible. Use flood fill tool and fill with your paper.
Apply the Mask, merge the group, now Duplicate the Mask Layer, on the layer,
Select All - Modify ( Expand X6 ) - Effects ( Mosaic Antique ) at these settings,
columns 33 - rows 33 - tile diffusion 60 - widith 3 - grout diffusion 100 and
have the symmetric box checked, Apply. Now on Layers, slide the setting from 100 to 60.
Cross out your white Background ( tic on the Eye to red X ),
now merge the two mask layers visible. untic the eye on white background.
Open the Round bcs frame.. Copy, paste as new image, close the org.
on the Copy, go to Hue Saturation, in Hue/Saturation/Lightness use these settings ,
Tick Colorize, set Hue at 315, Saturation 68, Lightness 2, Ok
Use the Magic Wand in the Center of the Frame, you will see the marching ants, go to Selections, modify - Expand, set at X2.-OK flood fill with white..Float, defloat, copy your tube and Paste, use the mover tool to set tube where you like it best.now invert..use your Delete key and the edges of the tube hanging outside of the frame will disapper. Select None..Drop Shadow the tube at these settings,Offset Vetical -2, Horizontal -2, Opacity 41, Blur 5.00, Color Black.
Merge Layers Visible. Copy and Paste to your Background Layers.. Add the Elements you like from the bcsscraps you like. Drop shadow each at the same sttings as used on the tube.
Add the Tube Copyrights and Your own Credits. Merge all Visible..
Save as JPEG-JFIF Compliant
This TUT is a BGHsnailtags Copyright
Teddy Hugs
The tube I have used is a pay to use licensed Keith Garvey, found here.
Scrap is by Baby Cakes you can purchase it here.
I used Weecotslass Mask #263 found here.
Text used is DJ Garden
{note about the Scrap}
Lynne has beed adding things to the blog, when you click on the
link, when page opens scroll to the bottom and tick on Older Post.
This TUT is for Advanced users of PSP. I have not used plug-ins on this TUT.
Open a 600 X 600 flooded with white. And a Transparent 600 X 600.
Minimize the White Background.
{ Note: Remember to Save Offen }
Open your Tube a minimize also, find the bcs green angel paper open, copy,
and paste into the Transparent raster. In layers, load disk from mask, and find the mask
use the settings shown.
Click OK.. go to Adjust, Hue/Lightness Colorize..use the settings below, then tick OK
Go to Effect-Texture-Mosaic Antique Use these Settings
re-size to 80% , Copy.. Open the White Background and paste the
your Mask raster. Merge Visible
Open the bcs patchwork Frame..Copy and Paste as a new image. close out the org. frame. Re-size your copied frame to 25%, Use the Magic Wand and tick inside the empty spot of the frame {also the small hole in the lower left corner} go the Selection-modify, expand x2.. You will flood-fill the color of your choice. I used the color show below.
Now in Selection, select none. Pull up your Tube and Copy and Paste as New Image now in Image Mirror you tube,{ if you to is very large you may have to re size} Use your Magic Wand and tick inside the frame where you just added color. Copy the mirrored tube and paste as a New layer, tic on the mover tool to move the tube in place. When you are satisfied with where you have it placed. Go to Selection-invert-float-defloat-and use the Delete key on your keyboard. Now do a Drop Shadow at these settings, then Merge Visible
Copy and Paste onto the Background.
Now to add the same tube again.. {Do not mirror this one} Copy and paste the tube.
Open the Scraps and chose the Elements you like. When you are satisfied with it,
go down the layers and add the same settings on drop shadow for all layers,
except the Background. When You have all the Drop shadows in Merge Visible.
Save as .jpg
This TUT is Written by ©BGHsnailtags.
No part of this TUT is to be Copied, and Pasted any where.
